使用工具模拟 Modbus 协议并抓包分析一些基础的功能码。
Environment
- Kali Rolling (2019.4) x64
- ModbusPal.jar
- mbtget
- Metasploit Framework
Preparation
启动 ModbusPal.jar,添加至少一个 Modbus Slave 作为模拟的 PLC:
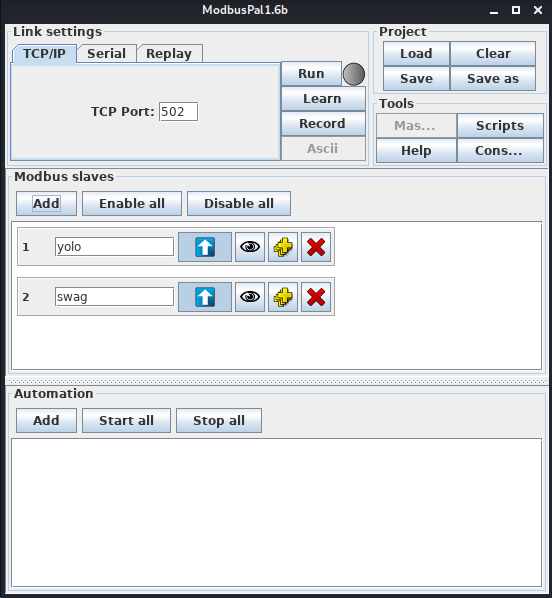
为新建的 Modbus Slave 分别添加 coils(比特)和 holding registers(16 位无符号整型),并设置一些值:


下载并安装 mbtget 工具:
$ git clone https://github.com/sourceperl/mbtget.git & cd mbtget
$ perl Makefile.PL
$ make
$ make install
Operate with Function Code
使用 mbtget -h 查看命令行参数,其中只需要关注用于读写数据的几个参数:
root@kali:~# mbtget -h
usage : mbtget [-hvdsf] [-2c]
               [-u unit_id] [-a address] [-n number_value]
               [-r[12347]] [-w5 bit_value] [-w6 word_value]
               [-p port] [-t timeout] serveur

command line :
  -h                    : show this help message
  -v                    : show version
  -d                    : set dump mode (show tx/rx frame in hex)
  -s                    : set script mode (csv on stdout)
  -r1                   : read bit(s) (function 1)
  -r2                   : read bit(s) (function 2)
  -r3                   : read word(s) (function 3)
  -r4                   : read word(s) (function 4)
  -w5 bit_value         : write a bit (function 5)
  -w6 word_value        : write a word (function 6)
  -f                    : set floating point value
  -2c                   : set "two's complement" mode for register read
  -hex                  : show value in hex (default is decimal)
  -u unit_id            : set the modbus "unit id"
  -p port_number        : set TCP port (default 502)
  -a modbus_address     : set modbus address (default 0)
  -n value_number       : number of values to read
  -t timeout            : set timeout seconds (default is 5s)
首先对 coils 进行读取,-a 表示地址,-n 表示读取的数量:
root@kali:~# mbtget -r1 -a 0 -n 10 127.0.0.1
values:
  1 (ad 00000):     1
  2 (ad 00001):     1
  3 (ad 00002):     1
  4 (ad 00003):     1
  5 (ad 00004):     0
  6 (ad 00005):     0
  7 (ad 00006):     0
  8 (ad 00007):     0
  9 (ad 00008):     0
 10 (ad 00009):     0
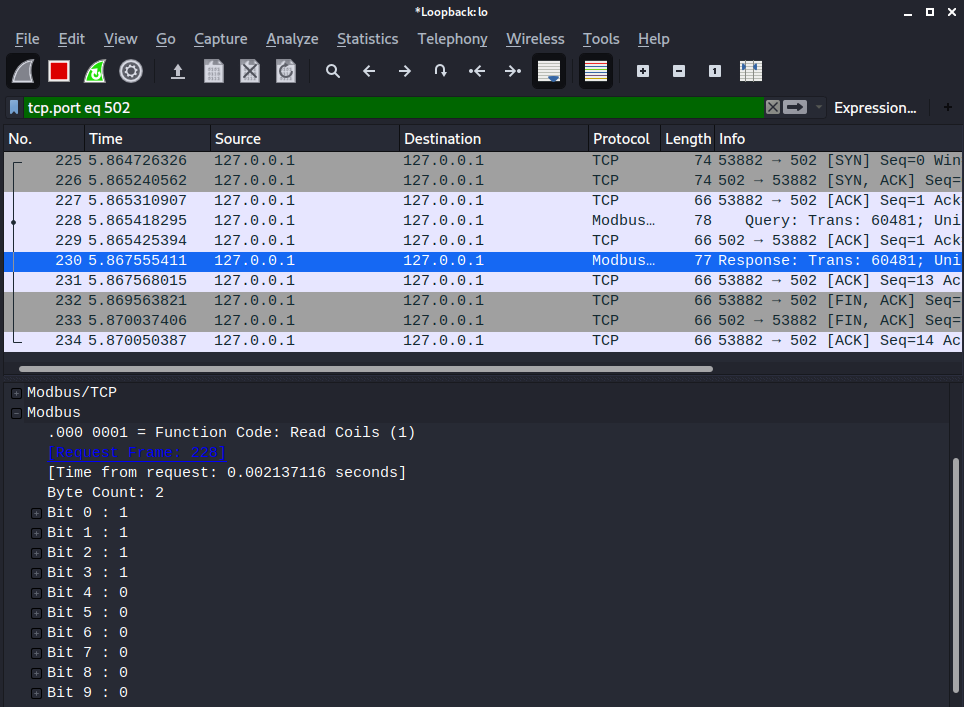
在 Wireshark 中抓包并筛选,前后分别为 TCP 三次握手和四次挥手。中间两条 Modbus 协议即为我们进行的操作,首先是发出进行读取的请求,Function Code 是 Read Coils,Bit Count 为 10,即读取 10 个比特:

Response 中返回的数据即为前 10 个比特的值:
接下来对 holding registers 进行读取:
root@kali:~# mbtget -r3 -a 0 -n 10 127.0.0.1
values:
  1 (ad 00000):     0
  2 (ad 00001):     0
  3 (ad 00002):     0
  4 (ad 00003):     1
  5 (ad 00004):     2
  6 (ad 00005):     3
  7 (ad 00006):     4
  8 (ad 00007):     5
  9 (ad 00008):     0
 10 (ad 00009):     0
和前面类似,Function Code 是 Read Holding Registers,Word Count 为 10,即读取 10 个字:

Response 中返回前十个 holding registers 中的内容:

然后对写 coil 操作进行设置:
root@kali:~# mbtget -w5 1 -a 2 127.0.0.1
bit write ok
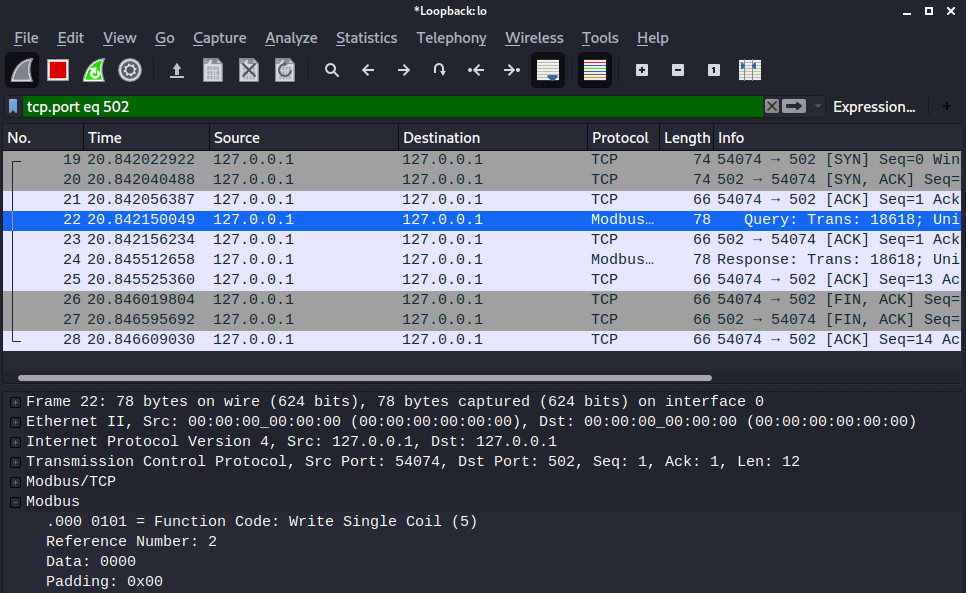
抓包看到的 Function Code 为 Write Single Coil,Reference Number 为 2(即第 3 个位置),Data 为 0:
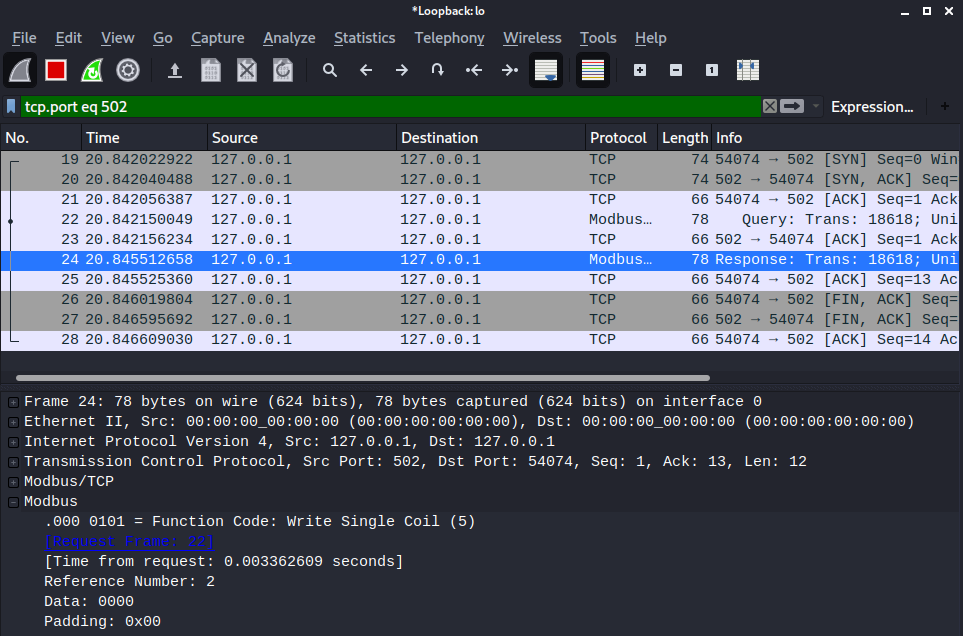
Response 包中返回修改后对应位置的值:
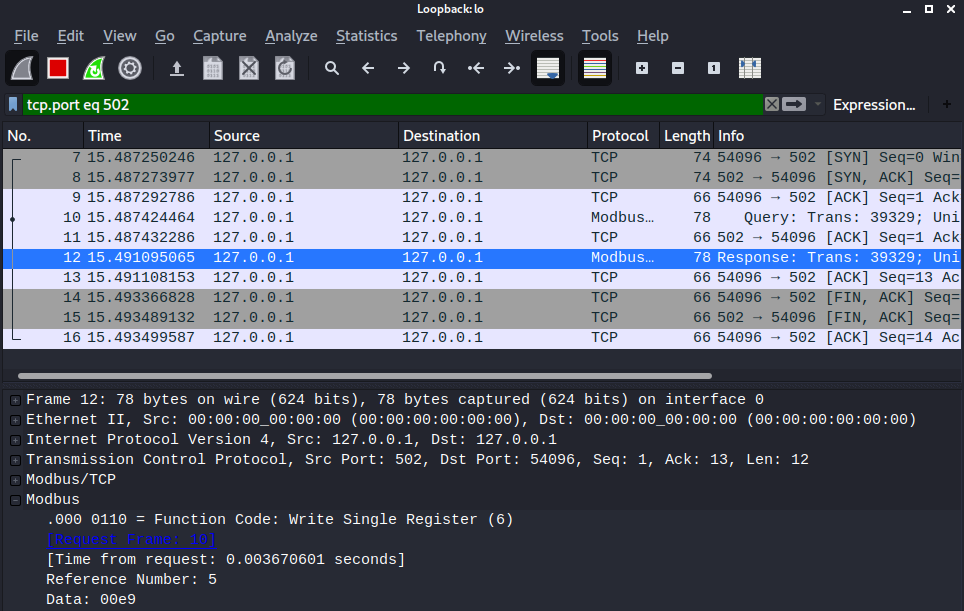
写 holding register 的操作类似:
root@kali:~# mbtget -w6 233 -a 5 127.0.0.1
word write ok
抓包得到 Function Code 为 Write Single Register,Reference Number 为 5,Data 为 0xe9(233):

Response 返回修改后的结果:
使用 MSF 同样可以进行类似的操作,如读寄存器内容:
msf5 > use auxiliary/scanner/scada/modbusclient
msf5 auxiliary(scanner/scada/modbusclient) > set ACTION READ_HOLDING_REGISTERS
ACTION => READ_HOLDING_REGISTERS
msf5 auxiliary(scanner/scada/modbusclient) > set RHOST 127.0.0.1
RHOST => 127.0.0.1
msf5 auxiliary(scanner/scada/modbusclient) > set DATA_ADDRESS 5
DATA_ADDRESS => 5
msf5 auxiliary(scanner/scada/modbusclient) > run
[*] Running module against 127.0.0.1

[*] 127.0.0.1:502 - Sending READ HOLDING REGISTERS...
[+] 127.0.0.1:502 - 1 register values from address 5 :
[+] 127.0.0.1:502 - [3]
[*] Auxiliary module execution completed
写寄存器内容:
msf5 > use auxiliary/scanner/scada/modbusclient
msf5 auxiliary(scanner/scada/modbusclient) > set ACTION WRITE_REGISTER
ACTION => WRITE_REGISTER
msf5 auxiliary(scanner/scada/modbusclient) > set RHOST 127.0.0.1
RHOST => 127.0.0.1
msf5 auxiliary(scanner/scada/modbusclient) > set DATA 123
DATA => 123
msf5 auxiliary(scanner/scada/modbusclient) > set DATA_ADDRESS 6
DATA_ADDRESS => 6
msf5 auxiliary(scanner/scada/modbusclient) > run
[*] Running module against 127.0.0.1

[*] 127.0.0.1:502 - Sending WRITE REGISTER...
[+] 127.0.0.1:502 - Value 123 successfully written at registry address 6
[*] Auxiliary module execution completed
抓包的结果和 mbtget 相同。
Addition
MSF 中还有一些模块可以用来执行 PLC 命令:
msf5 > use auxiliary/scanner/scada/modicon_command
...
msf5 > use auxiliary/admin/scada/modicon_stux_transfer_ASO
使用 nmap 探测 PLC 开启的端口:
nmap -n -T4 -p- -scan-delay=1 [TARGET]
使用 snmpcheck 可以获取指定 PLC 的相关指纹信息:
snmpcheck -t [TARGET]
Joke
工控安全很难做好是因为原本设备的使用期限就很长(十年甚至二十年以上),本身维护的开销又很大,一个漏洞的修复很难落实到每一点上。然而真正要做到安全,则需要从管理、设备、操作人员等多个方面协作才能实现。

References
https://www.youtube.com/watch?v=iGwm6-lyn2Y
https://www.youtube.com/watch?v=rP_Jys1_OJk